
GeoMaps provide users with a method to toggle between their custom illustrated map and a street and satellite base map layer. Adding a GeoMap also enables directions and current location features.
The steps below will outline how to enable and configure GeoMaps.
- Login to your nuCloud account, open your map in the Workbench.
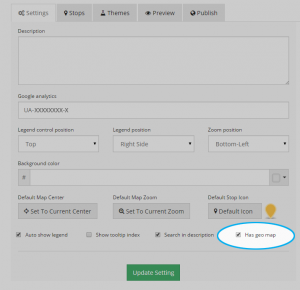
- Select the “Settings” Tab and toggle the “Has Geo Map” option and click green “Update” box.
- Next, select the “Stops” tab.
- Click the edit icon next to the stop you wish to add coordinates to.
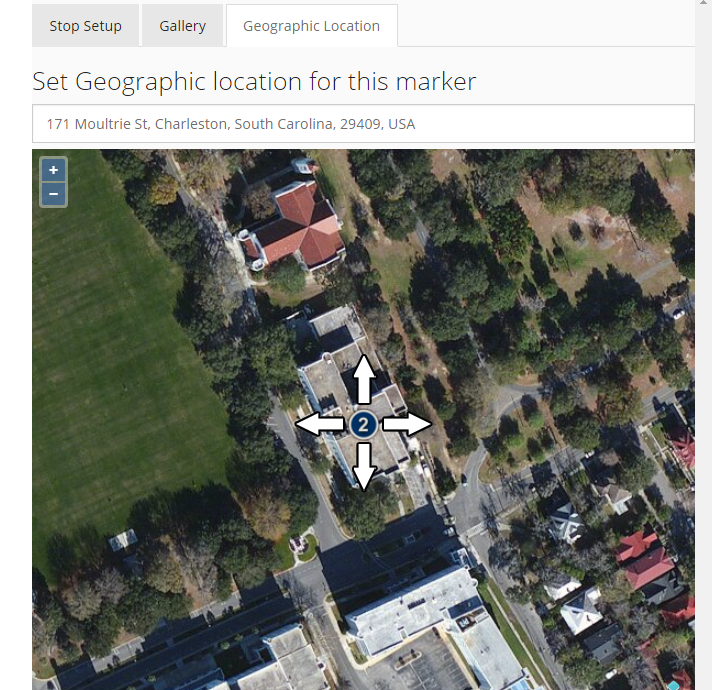
- Click on the “Geographic Location” tab.
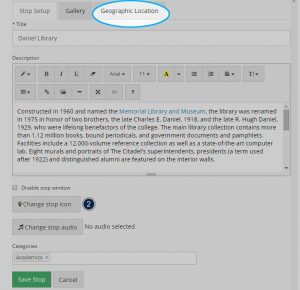
- Start by typing an address.If you don’t know the address of this location, use the address of your institution or the nearest building. This is just for a starting spot.
- The address search will change the position of the satellite map box. Drag the stop icon within the map box to your building’s location and this will assign a latitude and longitude for the location. If your building is not reflected on this map, that’s okay. This map is only used as a method to collect the geographic coordinates.
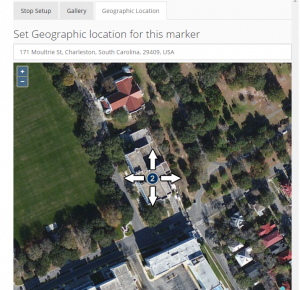
- Once the stop icon is in its correct location, press the “Save Stop” button.
- Back on the “Stops” tab, your stop will now have a blue globe icon next to it indicating that it has a physical location.
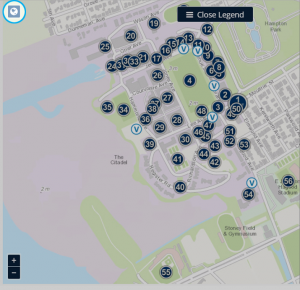
- When you are ready to view your GeoMap, go to the “Preview” tab and click the globe icon at the top left corner of your map. This icon can be styled or replaced using the custom css editor under the “Themes” tab.


Now that you have added coordinates to a stop it will add a directions button to the stop window. The direction button can be customized through theme and css functionality.